In This Document:
0. Warning
1. Overview
2. Connecting to the Network
Microsoft Windows Vista is not supported by GWU Information Technologies. The information below is for informational purposes only. We are unable to support or troubleshoot any problems that you may have.
GWU provides wireless Ethernet coverage throughout the Cedar City Campus. The network is 802.11b wireless Ethernet, using the WPA2 security standard, with transfer speeds of 11 megabits per second (Mbps).
To connect to GWU's wireless network, your laptop must have an 802.11b compatible wireless Ethernet adapter that is WPA2 certified. Many 802.11g, 802.11a/b and 802.11a/b/g wireless cards support WPA2 and are also compatible. 802.11a wireless cards are not compatible.
Wireless networks are a shared resource; thus, the more users that connect, the less bandwidth per user. For this reason, wired Ethernet remains the best choice when available. Downloading large files (movie trailers, MP3’s, etc.), streaming audio or video, or using file sharing services will slow the wireless network down for everyone, so please refrain from these activities.
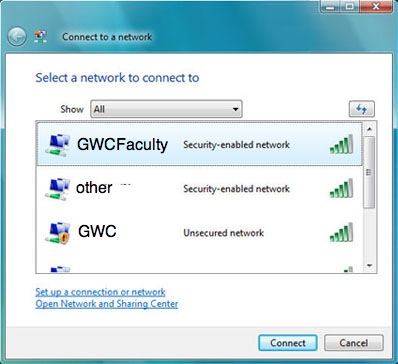
1. Go to the Start menu, select Control Panel, then Network and Sharing Center. On the left-hand side of the window, under tasks, select Connect to a Network.
2. Select the GWCFaculty SSID and click Connect, as illustrated.
3. A window will appear, stating that “Additional log on information is required to connect to this network.” Select Enter/Select additional log on information.
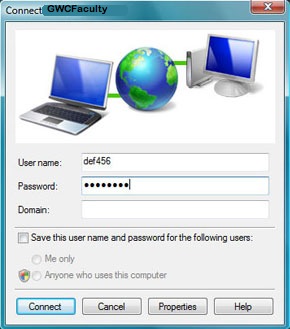
4. Enter your NetID in the User Name field, and your NetID password in the Password field, as illustrated. Leave Logon domain blank.
5. A second window will appear, stating that “Additional log on information is required to connect to this network.” Select Enter/Select additional log on information.
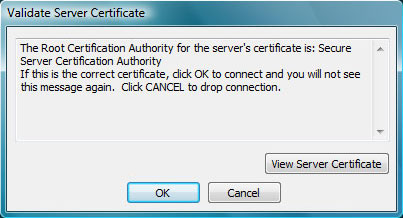
6. When asked to validate the Server Certificate click OK, as illustrated.
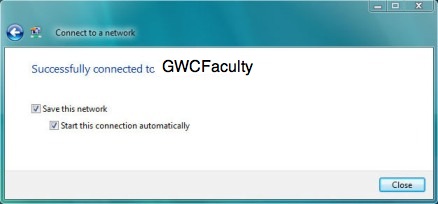
7. Once successfully connected, click Close.
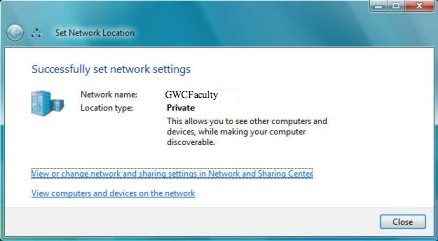
8. When asked to Set Network Location, select Public. Click Continue when prompted by User Account Control.
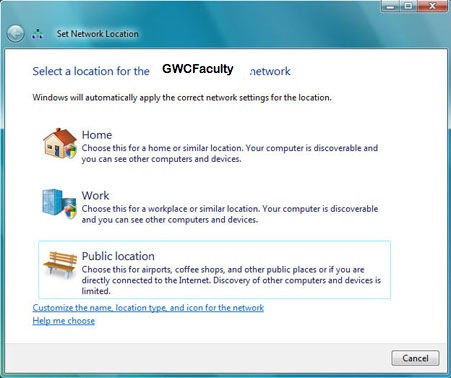
9. Finally, click Close after successfully setting the Network Location.